Construction Services
Real Estate1 Agency Corporation Construction Services Department!

Engineer Khattab Omar Abuisbae “Istanbul”,Turkey,Year1978, Photo.
Call for a Quote
(424) 777-2201
+(962) 79-681-9201
+(962) 77-830-3512 & WhatsApp
All Services
Services
Building Construction
BUILDING CONSTRUCTION PROCESS FROM START TO FINISH
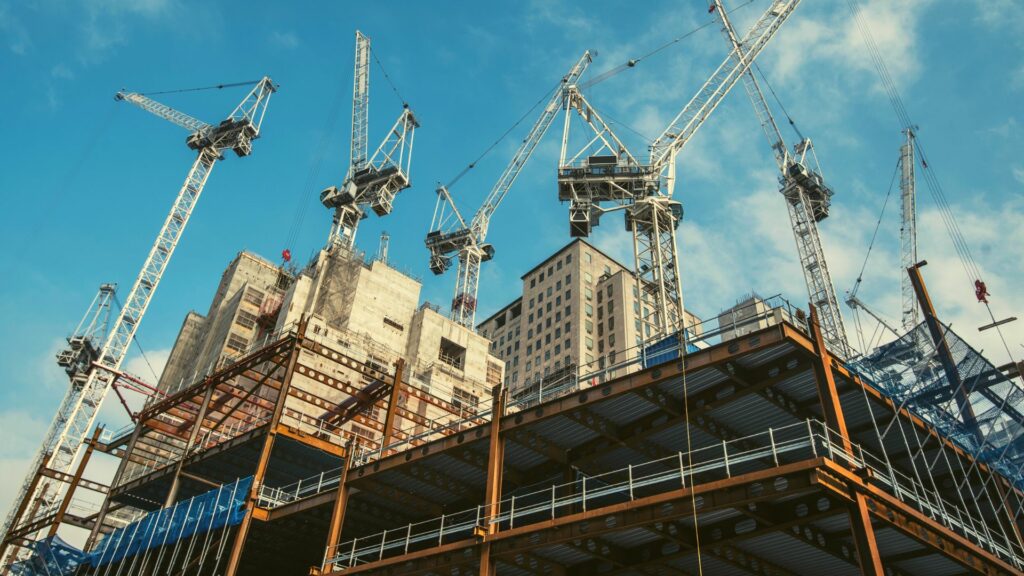
Building construction is an ancient human activity that began purely from a functional need to provide shelter from the elements. Over time, human beings have adapted to a variety of climates. The first human shelters were basic structures that did not last long.
Now, more durable structures are available thanks to the development of durable construction materials, elaborate building techniques and processes, and improvements in construction labor.
Building construction is a complex undertaking, irrespective of the type of building. Succeeding requires a lot of time, effort, and financial investment. The first step to a successful construction project is to develop an extensive plan.
The building construction process must be done step by step to ensure an efficient construction process. Consider important aspects such as the purpose of the building, finances, utility, and demand for work before starting the planning phase.
This article will discuss the building construction process from start to finish.
WHAT IS BUILDING CONSTRUCTION?
Building construction describes the physical activity on a construction site that contributes to building or structure construction. This process involves unloading the plant, machinery, materials, cladding, fixtures, fitting of installations, formwork, and external finish.
The building construction process is a series of routine tasks completed by skilled persons. It involves a lot of time and tedious work and must be managed carefully. This process can be split into three phases: pre-construction, construction, and post-construction.
STEP 1: PRE-CONSTRUCTION PROCESS
Before a project begins, the client must work closely with the design team and contractor to develop the project plan. The pre-construction process is where the contractor and the design team develop detailed drawings, budgets, schedules, and labor projections.
The core team defines the project and prepares cost estimates depending on the client’s budget. The team must also identify potential risks and develop solutions to ensure optimal use of resources.
The pre-construction phase is characterized by deliberate thoroughness to ensure that all potential needs are identified and addressed early. Regular communication between the core project team and the consultants is vital during pre-construction.
ACQUIRING LAND
The most crucial step in building construction is acquiring land for the project. The location should be well-suited for the project requirements. Before the land acquisition, it is best to conduct feasibility studies to ensure the land is strategically located and is free from land-related issues. It is also necessary to evaluate the project’s cost-effectiveness before kickoff.
INITIAL MEETING
The pre-construction phase starts with an initial meeting between the client and the general contractor. The parties can familiarize themselves with each other. It also allows contractors to understand the client’s needs.
The two parties must define the goals and objectives of the project at this stage. The client has an opportunity to ask questions that the contractor must resolve. The contractor must use this meeting to understand the client’s vision and decide whether or not they can execute it.
The initial meeting allows the contractor to determine the scope of work, the feasibility of the project, and the amount of work required. The contractor can then define the project deliverables and outline a schedule.
ESTIMATING AND BUDGETS
Once the initial meeting is completed, the contractor can visit the site and develop a design and layout. Building construction involves a considerable quantity of material and budget, and it is easy for costs to overrun. Once the planning and structural detailing is done, the construction estimator shares the details.
The construction estimator estimates the quantity and quality of materials needed. The contractor will then develop a budget that includes estimated costs of labor, materials, machinery, and other requirements. The budget will depend on the quality and quantity of materials needed.
If financial resources are limited, the contractor and the property owner must seek pre-approval loans before construction.
SCHEDULE
Once the project scope is laid out and the contractor has done a site visit, it is time to develop a project schedule. The schedule defines when certain aspects of the work will start and end.
The schedule is typically updated during the project lifecycle to paint a clearer picture of construction timelines. Project scheduling is crucial as it affects overall project costs and profit margins.
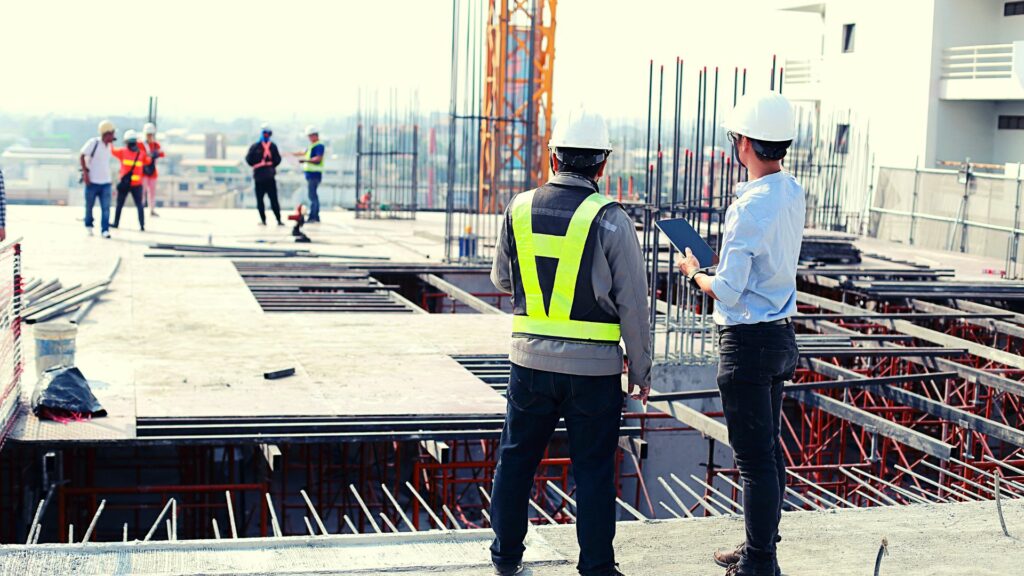
STEP 2: BUILDING CONSTRUCTION PHASE
With the project plan and team in place, it is time to clear the site and start building. The building construction phase is where the project comes to life. It is a critical step because it involves multiple working parts and deadlines.
Each contractor and subcontractor must now execute the plan, from site preparation to construction.
SITE PREPARATION
Site preparation is the clearing of the site in readiness for construction. Site preparation clears the way for other remedial or demolition work required before workers start constructing the building.
Site clearing involves removing rubbish, machinery, equipment, and unwanted materials. Some site preparation activities may require approvals. The workers must take care not to destroy any trees that are meant to be protected.
A site waste management plan (SWMP) is essential to ensure materials are managed and disposed of efficiently and legally. The SWMP also outlines the reuse and recycling of materials where possible. Only professional disposal experts should handle hazardous substances like asbestos and contaminated waste.
Site preparation is typically carried out under the main construction contract but can be carried out in advance. Site preparation can also be part of a wider enabling works contract, including soil stabilization, demolition, construction of access roads, and services diversion.
CONSTRUCTION
The construction process begins at excavation and ends once the interior and exterior finishes are complete.
EXCAVATION
Once the site is cleared, it is time for excavation. Excavation refers to the removal of earth to form a cavity in the ground. Small sites may do excavation manually using shovels, picks, and wheelbarrows. However, heavy plant machinery is used in large-scale excavations.
Excavation can be classified according to the material being removed, for instance, topsoil, muck, earth, and rock excavation. It can also be classified according to the purpose: trench, road, basement, and bridge excavation.
FOUNDATION
The cleared and excavated site is now ready for construction, and the foundation can be poured. The foundation is the lower part of the substructure. It transfers the building’s loads to the ground.
The foundation is built according to the architect’s drawings. The drawings determine the foundation’s length, width, depth, size, and type.
Concrete foundations are widely used for building structures. However, the choice of foundation can vary depending on the water table level and soil composition of the location. Soil testing is crucial to determine the bearing capacity of the soil.
Shallow foundations may be adequate for low-rise buildings. However, pile foundations are best for high-rise buildings. Builders will place formworks and reinforcements in the excavated trenches to construct the foundation. The Engineer must monitor the reinforcement works.
FRAMING
Framing is the installation of wood frames and steel beams to support the building. It is a time-consuming but crucial part of building construction as it sets the groundwork for the rest of the building.
MASONRY
Now that the framing is complete, it is time to begin the masonry work. The architect’s drawings will determine the material used: ash brick, concrete blocks, or bricks.
The masons bind the building materials using a cement mortar mix, leaving gas for the doors, windows, and doorways.
ELECTRICAL AND PLUMBING WORK
The specialty contractors are brought in to complete the rough plumbing and electrical work. This process involves installing pipes and wires under the floors, ceilings, and walls.
The electrical and plumbing work is not completed at this stage; only the rough work is done to enable drywall, insulation, and ceiling installation. The point and pipe ends must be left out and finished later with plumbing fixtures and electrical fittings.
This step is important to ensure that electrical and plumbing work is not visible after finishing.
ROOFING
Once the basic structure is done, roofing is installed. Roofing protects the interior from the weather elements, preventing damage and disruptions. The contractors should be brought in to start working on the exterior of the building at this stage.
EXTERIOR FINISHING
Exterior finishing involves plastering the external parts of the building. It also involves external cladding to elevate the house.
HEATING AND COOLING WORK
With a roof and exterior walls in place, it is time to address the heating and cooling needs of the building. This process involves the installation of vents, ducts, heating units, and cooling systems.
INTERIOR FINISHING
The next step is to plaster the internal walls for a smooth finish and install tiles on the floor. Interior finishing also includes installing drywall, ceiling, and insulation. The electrician can also come in and finish the outlets and install the light fixtures.
WOODWORK AND FIXTURE FITTINGS
The construction is almost complete now, and it is time to complete the plumbing fittings in the kitchen and bathrooms. Toilets, cabinets, windows, and doors are fitted too.
WATERPROOFING
Waterproofing is the process of preventing water from penetrating the building. Waterproofing is done to reduce humidity and keep the house dry.
PAINTING
Painting gives the house a beautiful finish and protects it from exposure to rain, dirt, sunlight, and stains. A good paint job can give a building 5 to 10 extra years of life.
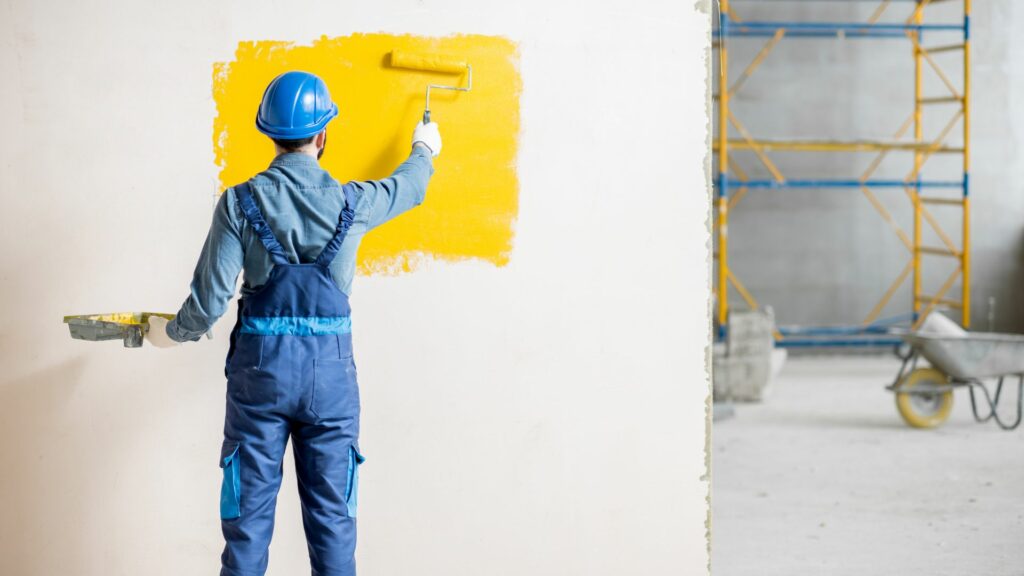
STEP 3: POST-CONSTRUCTION PHASE
The post-construction phase is the final process before the building is handed over to the client or owner. The post-construction phase includes completing the punch list items and the final walk-through. A punch list is a document that lists all the contract items a contractor must fulfill to be paid.
THE WALK-THROUGH
Once the construction is complete, the team must walk through the building to confirm that all the project specifications have been met. The contractor and the architect must certify that the building is fully functional.
If the architect is satisfied, they will issue a certificate of satisfactory completion. The relevant supervisors must confirm that the building meets the local authorities’ requirements, and the local government will issue a certificate of occupancy.
HANDOVER
The contractor can now hand over the building to the owner. The owner is given substantial time to confirm that they are comfortable operating every aspect of the new building. The contractor can provide training and support as necessary.
The contractor also must hand over all the blueprints and operation manuals to the owner.
SUMMARY
The building construction process is essential to the success of any construction project. It consumes a lot of time and resources but ensures no stone is left unturned.
The building construction process can be split into three main phases, pre-construction, construction, and post-construction. The three main phases of construction involve many systematic activities.
The pre-construction phase includes acquiring land, strategic design, preparing budgets and estimates, acquiring licenses and permits, and hiring experts. The construction phase involves site preparation, excavation, foundation, framing, masonry work, roofing, interior finishes, and exterior finishes.
Finally, post-construction involves the final walkthrough and the handover of the completed building.
Foundation Work
THE FOUNDATION CONSTRUCTION PROCESS
The foundation of a home or building is essential to the value and safety of the structure. The construction must be done correctly in terms of the type of foundation being formed, avoiding problems with settlement, and properly preparing the subgrade through final curing stages. Each phase of foundation construction has necessary requirements and components upon which a structure depends.
Find concrete foundation contractors near me.
Below Sunlight Homes provides and excellent construction diary of the homebuilding process. Within this diary is excellent information on building a foundation with insulated stemwalls and radiant heating.
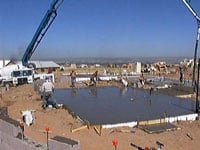
Foundation Construction Steps
1. Ground breaking, excavation
- Grading the lot and getting it tested for compaction
- Digging trenches for footings
- Setting batter boards to level the house

2. Footings dug, rebar set, inspection, footings poured
- Installing rebar (and using safety caps)
- “Boom pumping” concrete
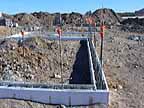
3. Polysteel stem wall forms, stems poured, rough-in plumbing
- Installing polystyrene blocks for pouring insulated stemwalls. Cold migrates into the home through the stem walls and slab if the stemwalls are not insulated.
4. Radiant heat, inspection, poured slab
- The ground inside forms is prepped for the slab
- Plumbing pipes are run under the ground and stubbed up in their exact locations
- Black plastic is laid on the ground as a radon shield
- Plastic tubing is laid for the radiant heat. The location and density of the tubes correspond with the space it will be heating and the finish flooring to be used.
- The concrete Is “boom pumped” into place
5. Clean-up, site grading, block wall
- The site is cleaned up and prepared for the framing crew.
Tear-Downs & Haul-Offs
Tearing down and scraping a site is an essential part of any construction project. It involves the removal of existing structures and materials to create a clear and level surface for the new construction. Whether you’re building a new home, commercial building, or remodeling an existing structure, you’ll likely need to tear down and scrape the site to make way for the new project.
In this blog post, we’ll cover the basics of tear-down and scrapes, including why they’re necessary, the steps involved, and the benefits of hiring a professional construction company like BOLD Construction to handle the job.
Why Tear Down and Scrapes are Necessary
There are many reasons why you might need to tear down and scrape a site before starting a new construction project. Here are a few of the most common:
- Safety concerns: Older buildings may contain hazardous materials like asbestos or lead paint that need to be removed before construction can begin.
- Structural issues: Buildings that are structurally unsound or have serious foundation problems may need to be torn down before new construction can begin.
- Obsolete design: Older buildings that don’t meet modern design and functionality standards may need to be removed to make way for a new, more efficient building.
- New project requirements: Sometimes, the design of a new building may require a different layout than the existing structure. Tearing down the old building can create the space needed for the new design.
Steps Involved in Tear Down and Scrapes
Tearing down and scraping a site is a complex process that involves several steps. Here are the basic steps involved:
- Preparation: Before any demolition work can begin, the site needs to be cleared of any furniture, debris, and personal belongings.
- Asbestos and lead paint removal: If the building contains hazardous materials, they need to be safely removed by a licensed professional.
- Demolition: The building is then systematically demolished, with the debris removed and disposed of in an environmentally responsible way.
- Grading and leveling: After the demolition is complete, the site is graded and leveled to create a smooth and even surface for the new construction.
Benefits of Hiring a Professional Construction Company
While it’s possible to do tear down and scrape on your own, it’s often more efficient and safer to hire a professional construction company like BOLD Construction. Here are some of the benefits of doing so:
- Safety: Professional construction companies have the necessary training and equipment to safely remove hazardous materials and demolish structures.
- Efficiency: Professional companies have the experience and expertise to complete the job quickly and efficiently, minimizing downtime for your project.
- Compliance: Professional companies are familiar with local building codes and regulations and can ensure that the tear down and scraping work is done in compliance with all requirements.
- Environmental responsibility: Professional companies know how to dispose of hazardous materials and debris in an environmentally responsible way, minimizing their impact on the environment.
In conclusion, tear down and scrapes are a crucial part of any construction project, and it’s essential to have them done safely and efficiently. Hiring a professional construction company like BOLD Construction is the best way to ensure that the work is done right, and that the site is prepared for the new construction to come.
Site Management
11 Tips for Effective Construction Site Management

Construction site management is the process of orchestrating, supervising, and harmonizing the moving parts, including all activities, resources, and parties, involved in executing a construction project at a specific physical location. It serves as the backbone of the successful execution of construction projects.
Construction site management is multifaceted: At its core, it demands a mix of technical knowledge, leadership skills, communication abilities, and a thorough understanding of project management principles. Although construction site management takes place at the physical construction site itself, the process begins during the preconstruction phase. A proficient preconstruction process paves the way for streamlined construction site management by providing a well-defined roadmap, mitigating potential risks, and ensuring a clear understanding of project goals among stakeholders.
Implementing construction site management best practices ensures that projects are completed on time, within budget, and aligned with quality and safety standards. In this article, we will explore key best practices for contractors to utilize for construction site management to achieve the best possible results.
Table of contents
1. Keep safety a top priority.
Due to the industry’s higher potential for accidents and fatalities compared to other professions, safety is of paramount concern in construction site management. It plays a critical role in ensuring the well-being of workers and visitors, minimizing accidents, and maintaining a productive and compliant work environment. Construction sites inherently involve various hazards, ranging from heavy machinery operation to working at heights, and effective safety management is essential to mitigate these risks.
Some key safety considerations include:
Commitment from leadership
Owners and organizational leaders must place safety at the forefront of their company culture. By ingraining adherence to safety regulations and accident prevention into daily communication and work routines, every member becomes actively involved and invested in fostering a safer operational environment.
It’s essential to recognize that the efficacy of any safety program relies on the continuous delivery of consistent messaging and ongoing interaction with employees.
Comprehensive site safety plan
Developing a site-specific safety plan helps the contractor communicate and outline safety procedures for different work tasks and emergencies. These plans should be readily accessible to all workers, subcontractors, visitors and relevant stakeholders.
Regular updating and reviewing the plan is necessary to adapt to any changing site conditions and as the project progresses through different phases.
Ongoing education and training
Offer continuing safety education and training to keep workers informed of the most current safety protocols and regulations. Furthermore, mandate specialized training as needed based on the particular scope of work, tasks, or site-specific challenges to ensure the safe execution of activities on that particular project.
Consistent inspections
Safety inspections on jobsites are essential to systematically identify potential hazards, evaluate safety measures’ effectiveness, and ensure adherence to safety regulations.
By recognizing existing and potential hazards and assessing associated risks, safety inspections proactively mitigate dangers, ultimately saving lives and curbing financial and reputational costs linked to workplace accidents. Engaging in site inspections conducted by integral project team members like the superintendent and foreman, in conjunction with external experts such as safety managers, encompasses a comprehensive strategy for prioritizing jobsite safety.
This approach ensures a 360-degree assessment of the work environment, incorporating not only internal operations but also the expertise of professionals dedicated to maintaining the highest safety standards. This collaborative effort fosters a holistic perspective, as it draws upon the insights of those directly involved in daily activities and combines them with specialized safety knowledge, ensuring a culture of safety permeates the entire construction site.
Although safety managers and superintendents often bear the primary responsibility for on-site safety, the essence of a truly effective safety culture lies in the understanding that safety is a shared responsibility that transcends job titles, roles, or specific scope. This ethos is reinforced by the “Stop Work Authority” principle, which is frequently emphasized on projects during site orientation.
The “Stop Work Authority” empowers every individual on site with the authority, regardless of their position, to take immediate action if they perceive an imminent threat to life or safety. The strength of the “Stop Work Authority” lies not only in its ability to prevent potential accidents but also in its embodiment of a culture that values and prioritizes safety above all else. This concept encourages open communication, a willingness to address safety concerns, and a heightened sense of collective vigilance.
2. Understand site constraints — and opportunities.
Considering site-specific factors is key to effective construction site management. Every construction project is defined by a unique set of goals and parameters and the site conditions can play a significant role in determining project success. A thorough site analysis in the initial project planning phase is essential to identify and address both challenges and opportunities.
Site accessibility, which encompasses the ability of construction personnel, equipment, and materials to move to and from the site, greatly impacts project efficiency. Challenging site access can hinder project progress, cause schedule delays, and increase costs.
When formulating the plan for construction execution, the contractor accounts for the site’s egress, local traffic conditions, ensuring adjacent safe pedestrian and public pathways, the scheduling of material deliveries, emergency access, and adherence to applicable regulations. Before kicking off construction, the contractor also evaluates the site’s terrain, topography, and soil conditions. The physical characteristics of the land — such as slopes, uneven terrain, or rocky ground, as well as the soil composition — affect construction methods, foundation design, and excavation processes.
3. Foster a healthy job site culture.
Jobsite culture is the collective values, attitudes, behaviors, and communication patterns of the individuals working on a construction project. Project leadership molds job site culture and subsequently imparts it to all those on site, including workers and subcontractors. Maintaining a positive jobsite morale fosters open communication and effective collaboration among different trades, subcontractors, and project stakeholders. Approaching the project as one team creates a culture that encourages problem-solving and continuous improvement, resulting in the development of creative solutions and innovative approaches to challenges that arise during construction.
Prioritizing the development and reinforcement of a positive jobsite culture that aligns with the project’s goals and values is a key piece to effective construction site management and ultimately fosters an environment where all workers can thrive and contribute to the project’s success.
4. Map out the sequence of tasks.
Sequencing plays a pivotal role in defining the project workflow. It entails arranging tasks and activities in a strategic sequence to attain project goals with efficiency. This is of utmost importance because certain tasks may depend on the completion of others or have specific prerequisites. Once a clear sequence of tasks is established, a detailed project plan that outlines the specifics of each task, resource allocation, timelines, and milestones can be created.
Collaborate with internal project team members and specialty contractors to ensure that project timelines are feasible and account for any potential delays. It’s important to avoid overloading team members with unrealistic deadlines, as it can lead to burnout and compromised quality.
Once the sequencing order has been determined, it’s crucial to communicate this information effectively to specialized contractor partners. Ensuring that everyone is on the same page regarding the order and timeline of tasks and activities helps confirm their availability and prevents any misunderstandings later on in the project.
As the project progresses, continuously review and update the project plan to accommodate evolving circumstances or conditions. This enables the team to respond to changes, tackle challenges, and ensure that the plan remains relevant. Typically, this process often involves reallocating resources such as manpower, materials, and equipment to align with the critical path forward.
5. Strategically select subcontractor partners.
Strategically selecting subcontractor partners is a key aspect of construction site management that has a significant influence on the project’s success. Subcontractors play a crucial role in executing specialized scopes of work, and their performance can impact project quality, timelines, and overall outcomes. General contractors frequently compile a roster of pre-qualified specialty contractors to choose from. During the prequalification stage, the general contractor assesses specialty contractors using criteria such as their past performance, safety rating, experience, references, and financial stability.
A general contractor should consider the project’s parameters and goals when selecting a subcontractor. For example, if sustainability and efficiency are important to the project owner, the general contractor should prioritize selecting subcontractors who possess expertise aligned with these aspects within their scope of work. Investing time and effort in choosing reliable, capable, and compatible subcontractor partners can lead to smoother project execution, enhanced project outcomes, and improved client satisfaction.
6. Document everything.
Documenting in construction site management is essential for maintaining transparency, accountability, and effective project execution. Construction projects involve numerous stakeholders, complex processes, and potential risks. Proper documentation helps capture critical information, facilitate communication, and provide a historical record of project activities.
When tasks, responsibilities, and timelines are documented, it becomes easier to hold individuals and teams accountable for their agreed-upon contributions. This helps avoid finger-pointing and facilitates problem-solving if issues arise.
Construction projects also often must adhere to regulatory standards and permits. Proper documentation helps demonstrate compliance with applicable laws and regulations. In addition, properly documented information can serve as evidence and support legal claims or defenses in case of conflicts or legal challenges. This encompasses aspects like delineating the contract’s inclusions and exclusions, specifying the mutually agreed-upon scope of work, outlining procedures for handling change orders, addressing payment and invoicing, and establishing standards for quality control.
7. Incorporate rigorous quality management procedures.
Implementing effective quality control and quality assurance practices is essential for ensuring that construction projects meet the required standards and deliver high-quality outcomes. The first step of quality management is clearly defining standards. Establishing clear and detailed quality standards for each aspect of the project, including materials, workmanship, and final deliverables, creates alignment between all stakeholders on project outcomes. Regularly conducting inspections and quality tests at various stages of the project helps to identify and address potential issues early, minimizing cost and schedule impacts as the work progresses.
A comprehensive plan for quality oversight reduces rework, improves the final product, boosts client satisfaction, and enhances a contractor’s reputation. A track record of projects executed with precision and minimal issues due to effective quality management also builds trust and credibility, solidifying a contractor’s positioning in the market.
8. Prioritize open and clear communication.
Effective communication is a cornerstone of successful construction project management. Emphasizing clear, open, and respectful communication can enhance collaboration, minimize misunderstandings, and contribute to the overall success of construction projects. Establishing reliable communication tools and methods, such as regular team meetings, email updates, and dedicated communication software or platforms, ensures that all project stakeholders know how and when to communicate any updates, issues, and progress.
Leadership that encourages transparency where team members feel comfortable sharing progress updates, concerns, and suggestions further fosters trust and collaboration. This supports project teams in proactively addressing risks or challenges that arise as opposed to merely responding to them after they develop.
9. Embrace technology.
The recent integration of technology in the construction industry enhances efficiency, accuracy, communication, collaboration, and overall project outcomes. Construction management software and tools aid in planning, scheduling, collaboration, budgeting, and reporting. These platforms also provide a centralized platform for storing project documents, plans, contracts, and communications, enabling easy access and organization for all stakeholders.
The use of Building Information Modeling (BIM) enhances project visualization and coordination. BIM creates a digital model that contains detailed information about the physical components, geometry, materials, and spatial relationships in a project. It serves as a shared knowledge resource for all stakeholders throughout the project lifecycle.
BIM also enables clash detection, a process that identifies conflicts among different building elements or trades before construction commences. Clash detection, previously referred to as a coordinated set of drawings, is an ask between the mechanical, electrical, and plumbing (MEP) trades before installing materials in a structure’s plenum space.
This proactive approach mitigates the need for expensive modifications during the construction phase. For instance, consider an area within a building where multiple systems converge—a mechanical duct intersects with a structural beam and electrical conduit. In the absence of coordination, these systems might clash, leading to cost overruns, project delays, and potential safety risks during construction. By utilizing BIM’s clash detection, it becomes evident that the mechanical duct intersects with a structural beam and electrical conduit. Consequently, specialty contractors collaborate to alter the duct’s pathway or adjust the placement of the beam and conduit, all before the commencement of work on-site.
In addition, mobile devices and apps now enable real-time communication and information sharing among members of on-site teams. They facilitate instant updates, photo sharing, progress tracking, and issue reporting directly from the field.
These platforms are also now cloud-based, offering secure storage and accessibility of project data from anywhere, fostering collaboration and communication between all project parties.
10. Incorporate lessons learned from past projects.
Learning from past experiences is a fundamental aspect of effective construction site management. It involves reflecting on past projects, identifying successes and challenges, and applying those lessons to improve and streamline future projects.
By analyzing past projects, contractors can pinpoint areas where processes, strategies, or communication could have been more efficient. Implementing improvements based on these insights enhances overall project performance. Contractors can gain an understanding of how resources were allocated on previous projects, which contributes to improved planning and optimization in terms of labor, materials, equipment, and budget considerations.
1. Create a project closeout checklist.
Project closeout is the final phase of construction site management that ensures the completion and successful handover of the project to the client.
This process encompasses various elements including:
Gather necessary documentation: Compile and organize all project documentation, including drawings, operation and maintenance (O&M) manuals, warranties, permits, and inspection reports for handover to the client.
Address the punch list: Identify and resolve any outstanding issues, defects, or deficiencies in the punch list before final handover. Work with subcontractor partners to ensure all items are resolved satisfactorily, adhering to predetermined quality benchmarks.
Perform the final inspections: Conduct thorough final inspections to verify that all work aligns with quality standards and regulatory requirements.
Walk the client through the final space: Offer the client a tour of the final space to ensure they’re satisfied and address any questions or concerns they may have.
Effective construction site management stands as the foundation of successful project execution. By meticulously planning, coordinating resources, fostering communication, and adopting innovative strategies and tools, contractors can navigate the complexities of construction with precision. As the industry continues to evolve, embracing new technologies and methodologies while valuing safety, continuous improvement, and collaboration will undoubtedly continue to shape the future landscape of construction site management.
How We Do Started a Building Constructions?
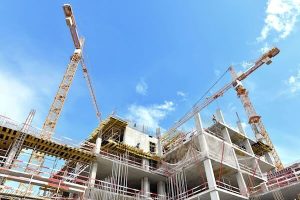
Building Constructions Photo1
Stages of Construction: A Basic Overview
Constructing buildings of any kind is a very detail-oriented process. No matter if you are constructing a medical facility, car dealership, or manufacturing operation there are very definitive steps that must be taken to ensure the safety of construction workers, employees, and patrons of the future building. While specifications and permits can vary from project to project the general order of operations in any construction project remains the same. When working with an experienced construction firm like Real Estate1 Agency Corporation’s Construction Department, you can be sure that your project will adhere to this general timeline, and be completed in a timely fashion. Here is a general overview of the different stages of construction and what can be expected at each stage.
CREATING A CONCEPT AND DESIGN
The very first stage of construction is to create a concept, followed by a design and blueprints. Typically, this is done with the help of an architect to ensure everything is up-to-code and that the design will be structurally sound and stable. We work with our clients to ensure that the building will suit their needs and serve the business for many years to come.
OBTAINING BUILDING PERMITS
Once you have blueprints and construction plans, you will need to obtain the right building and construction permits. This process will be ongoing throughout the construction project, as you need to obtain different permits at different times. Working with an experienced construction firm aids this process immensely. Our experience in obtaining the proper permits at the right time helps our process run smoothly and on time.
CLEARING AND EXCAVATING THE LAND
After obtaining your initial building permits, your construction project will commence by clearing and excavating the land upon which you want to build. This includes removing any trees, boulders, or other obstacles that are in the way of your building, and leveling or grading the ground.
POURING THE FOUNDATION
When the space you are building is cleared and excavated, the foundation can be poured. Depending on the size of your building and the stability of the land, preparing the subsurface may need to be done before the foundation is poured.
COMPLETING THE FRAMING
Once the foundation has been poured and cured, framing begins on your building. This may include installing wood frames or steel beams. This process does take a while and everything must be done correctly. This essentially sets the groundwork upon which all the other aspects of your building will follow.
DOING ROUGH ELECTRICAL AND PLUMBING
After the building has been completed and framed out, a specialty contractor will come in to complete rough electrical and plumbing work. This involves installing the pipes and wires where they need to go. Their job will not be completed at this point, but it helps to get the rough work in place so drywall, insulation, and ceilings can go up.
INSTALLING THE ROOF
At about the same time that the rough electrical and plumbing work is done, roofers come in to complete the roof on the building. This needs to be done before any further work inside of the building can take place, as rain and outdoor elements can damage the work that is taking place in the next few steps. About this time, contractors will also be called in to complete the exterior of the building, further protecting the interior work that is about to take place.
TAKING CARE OF HEATING AND COOLING NEEDS
Once the building has exterior walls and a roof, heating and cooling needs are addressed. Vents, ductwork, and the heating and cooling unit are all installed.
COMPLETING THE INTERIOR
Upon the heating and cooling work being completed, the interior is completed. This includes adding insulation, putting up drywall, and adding ceilings. An electrician often comes out during this stage and finishes up by adding outlets and lighting fixtures.
INSTALLING FIXTURES
Once the interior walls are up, all of the fixtures inside of a space can be added. This includes things like toilets, cabinets, windows, doors and elevators.
FINISHING UP
The last stage of construction involves putting the finishing touches on the building. This involves installing flooring, painting the walls, putting countertops in, or adding faucets in the bathrooms. Once this stage is done, the building process will be completed and you will be left with a beautiful building.
At Real Estate1 Agency Corporation’s construction Department, we can assist you with all aspects of construction. We provide administrative, design, project management, project supervision, and technical expertise for a variety of construction projects. Our team, which consists of engineers, construction managers, and contractors, can help you with every step of your building project. Contact us today to learn more about who we are, what services we offer, and how we can help you.
How We Finalized Our Building Constructions Finished Work?

Building Constructions Photo2
What Happens After Construction is Complete
Congratulations. Your office building construction is nearing completion. You made it through the pre-construction and construction phases without a hitch, and you are ready to cut the ribbon and move in. While we understand your excitement, there are still a few things that must be done before finalizing the project. The post-construction phase is just as important and should not be neglected.
Let’s take a look at the post-construction process to ensure you know what to expect once the building is complete.
HOW AND WHEN SHOULD POST-CONSTRUCTION BEGIN?
Despite what the name implies, post-construction starts before the completion of your commercial construction. Your contractor can start preparing you early on in the building process, so you have a good idea of what to expect during those final days.
You may remember a pre-construction checklist from those early days of the project. This is when the scope of the build is defined, and when a budget and schedule are set. Most commercial builders will have one to review with you after work is finished on the building. You can review this checklist throughout construction and make changes as any concerns arise.
THE PUNCH LIST
Before your contractor hands over the keys, you will be expected to complete a thorough examination of the building. Any areas of concern should be brought to the contractor’s attention at this time. This is your opportunity to ensure your new building fulfills the terms of the contract and helps ensure a smooth transition into your new space.
So, grab a clipboard and the contract specifications and start jotting down everything you see that still needs attention. Once you have done so, you will need to do another walk-through with the contractor as he creates the punch list. While your contractor may have another name for it, a punch list is simply a list of items that need to be addressed before the builder can hand the reins over to you.
THE FINAL PAPERWORK
Once everything has been checked off the punch list, you and the contractor will do a final walk-through of the building. If everything is to your satisfaction, you will receive the keys to your new office, along with a binder of paperwork. This should contain all relevant warranties and pertinent details from the project and should be kept on file, in a safe place.
Contrary to popular belief, the construction project does not end here. Next, the architect will contact you regarding any concerns. The architect will then issue a certificate of substantial completion. This signals that construction is complete and the contract has been fulfilled to your satisfaction. An inspector from your local government can now do a thorough inspection of the property. If the building meets all local building and permit regulations, the inspector will issue a Certificate of Occupancy. You are now ready to move in.
BUILDING SCHEMATICS AND OPERATIONS MANUALS
Throughout the construction project, your contractor works off of building blueprints to ensure everything goes as planned. Once complete, the final schematics should be handed over to you for your files. This, along with an operations manual, will ensure you and your team have a clear understanding of the building and its mechanics.
TRAINING AND FOLLOW-UPS
While many contractors believe their responsibility ends with the issuance of the Certificate of Occupancy, a contractor with quality service won’t stop there. They should do a complete walk-through of the building and provide you with literature and training on any special features.
Additionally, you should expect a follow-up meeting with the contractor. This is an opportunity to see how everything is performing and uncover any issues that need to be addressed. A quality contractor will stand by their work, the subcontractor’s work, and the supplies used in the building’s construction. Any concerns or issues should be addressed swiftly and honored under the warranty.
Your contractor should check in with you periodically over the next year or two. These check-ins offer several benefits. Any questions or concerns you might have can be addressed at that time. The contractor can not only use this as a learning opportunity but also as a chance to gauge how well the building meets your needs and what your future needs may be.
A FINAL WORD
Anyone who has had a new home or commercial building constructed knows there is a lot that goes into a project of this magnitude. Careful planning and attention to detail is critical. We understand that the entire process can be demanding at times. However, these procedures are in place to ensure quality service and a safe building. One that you and your team will enjoy for years to come. Contact our experts at Real Estate1 Agency Corporation’s Construction Department. We will help you with your project, no matter the size, no matter the phase.
How We Do Painting Work of a “Building Constructions”?
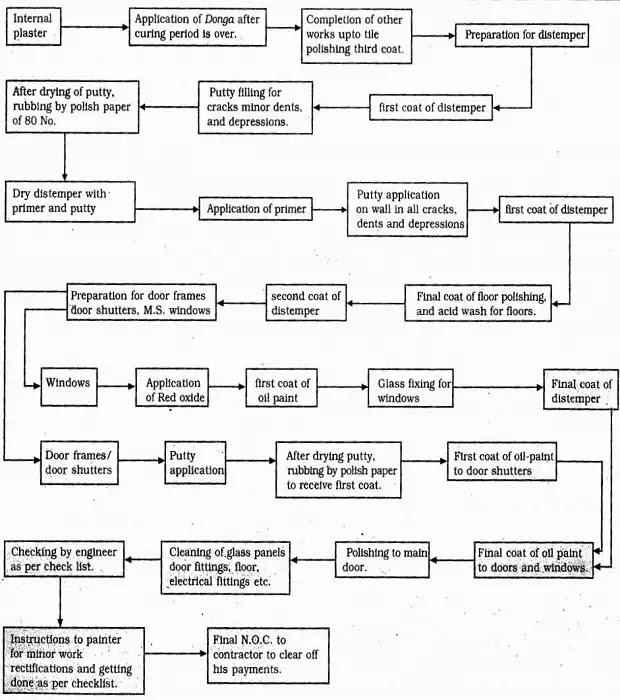
PAINTING WORK PROCEDURE – BUILDING CONSTRUCTION, TYPES, DIFFERENT SURFACES 2023
The painting work procedure is the finishing item in any construction. Painting affects the total appearance of a building from inside and outside. Therefore, it should be carried out with the great skill of workmanship.
This chapter deals with the painting work procedure, specification of materials, types of paint, mode of measurements, etc.

OBJECTS OF PAINTING WORK
Paints and varnishes are used in building and other engineering works for covering the surfaces of wood, metal, masonry, plastered walls, slabs, etc.
FOLLOWING ARE THE MAIN OBJECTIVES OF PAINTING WORK
- To protect the surfaces from atmospheric influences and to preserve them from decay, oxidation, and corrosion.
- To improve the appearance of surfaces.
- To facilitate the cleaning of surfaces.
TYPES OF PAINTING WORK
- Interior of flats bungalows.
- Interior common areas of a building.
- Exteriors of the building.
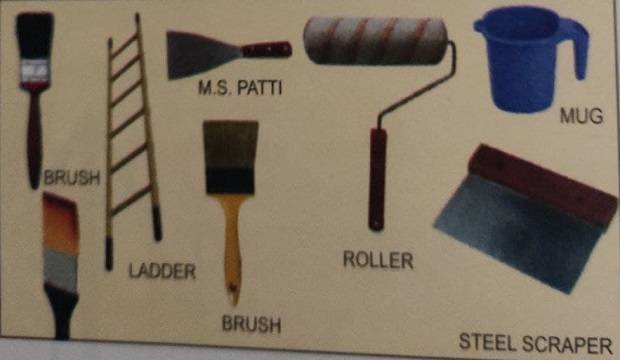
TOOLS REQUIRED FOR PAINTING WORK
Scraping patti, ladder, ghoda, zula, distemper brush, wash brush, oil paintbrush, fine brush; scraping papers 60 No., 80 No., 100 No., 120 No., scraper (metallic sheet), measuring jar, weighing balance, spray for whitewash, burning stove, fine chisel, and hammer.
PAINTING WORK PROCEDURE STAGES
- Donga
- Whitewash
- Dry distemper
- Oil paint
- Cement paint
1. DONGA
Donga is the lime water coat that is applied on plastered walls after the curing period is completed. Donga should be applied after a minimum of 21 days on Neeru finished walls and ceilings.
USE OF DONGA
- It absorbs moisture from the walls and helps achieve a better paint finish afterward.
- It acts as a crack filler for hairline cracks, on the freshly plastered sanla neeru surface of the walls.
- It acts as a basic coat for distemper and whitewash.
PREPARATION AND PROCEDURE OF DONGA
- Ensure that all plastering work is a plate, along with the necessary curing.
- All Chabad work (wall punctures) should be completed along with the necessary curing.
- Scrap the wall with a steel scraper of size 10cm x 7.5cm (4″ x 3″), to remove any unwanted material on walls, i.e., excess cement mortar, nails, dust, etc.
- Take 1/2 kg of lime to cover the 10 sq.m. (108s.ft.) area of the wall surface.
- Take the lime in a drum and mix the water in a 1:2.5 ratio (1kg lime to 2.5 liters of water).
- Stir this mixture properly.
- If required, sieve the lime water through a fine cotton cloth and remove the residue.
- Take a small quantity of lime water in a 5-liter tin.
- Apply donga with a 10cm (4″) wide bristle hairbrush.
- The Donga layer should not be very thick.
- Water should not be spread on donga until the application of distemper.
2. WHITEWASH
Whitewash can be applied to ceilings or walls, as specified.
PREPARATION AND PROCEDURE FOR WHITEWASH
- The preparation of whitewash is the same as donga.
- Add “Blue” to the lime water paste and mix properly. Then sieve through fine cotton cloth.
- Surfaces, where whitewash is to be applied, should be made smooth by rubbing out donga with fine paper.
- Apply the first coat of whitewash and allow it to dry for a minimum of 24 hours.
- Before applying the second coat of whitewash on the walls, ensure that the final coat of tile polishing is complete. This prevents stains of the polishing slurry.
- After the touch-up work is over, apply the third and the final coat on the walls/ceilings and check that no brush impression is visible.
- The final coat of the whitewash can be applied with a spray machine.
- After the coat has dried, check the appearance of the whitewash. Rectify any shade differences with another coat.
3. DRY DISTEMPER
Dry distemper is normally applied to the smooth finished surface of the walls in flats/ bungalows architects Pune. It is available in the Selection of shades that should be approved by the chief engineer. Shades can also be made as required.
SURFACE PREPARATION FOR DRY DISTEMPER
- Clean the wall surface thoroughly.
- Remove the donga completely with a scraper and polish the paper.
- Rub the wall surface with fine-grade paper 120 No. to ensure the proper adhesion of color.
- Clean any greasy spots and smoky surfaces carefully.
There are two methods to apply the dry distemper
- Dry distemper with primer and putty over the wall.
- Simple three coats of dry distemper.
For bungalows or ‘A’ class schemes, dry distemper with primer and putty is preferred.
(A) DRY DISTEMPER WITH PRIMER AND PUTTY
PRIMER PREPARATION AND APPLICATION
- Prepare the primer by adding 0.40 liter of turpentine to 0.80 liters of ready-made cement primer, to cover 10sq.m. (108s.ft.) of the wall surface.
- After surface preparation, apply the primer with a brush on the total surface of the wall.
- Allow the primer to dry for at least 24 hours.
PUTTY PREPARATION AND APPLICATION
- The engineer should check and ensure that the contractor follows the correct procedure of painting.
- Prepare the putty by mixing 3kg whiting powder with 0.25-liter cement primer, 0.25-liter synthetic enamel, O.15 liter linseed oil, and 1 liter water, to cover 10sq.m. (108s.ft.) wall surface.
- Fill up all the undulations of minor nature, dents, and cracks, so that the surface becomes completely smooth to receive paint.
- Where the dents are deeper the filling must be done with a filler paste of a thicker consistency and plaster of Paris.
- After 24 hours, the surface should be rubbed with fine paper, to get a smooth finish and even surface over the wall.
- Clean the wall surface with a dry cloth, to remove all dust and particles in the powder form. Prepare the wall for the first coat of distemper.
FIRST COAT OF DISTEMPER
- Use 1kg of dry distemper to cover 10 sq.m. (108s.ft.) area.
- Add water 0.8 liters for 1kg of distemper.
- Add 25gm glue in 1kg of dry distemper, to get more adhesion of paint to the wall surfaces.
- Stir this mixture constantly with a bamboo stick while it is being used.
- Use a 10cm (4″) bristle hairbrush for applying the ‘distemper.
- Brushstrokes should be first horizontal and then immediately in a vertical direction. Ensure that there are no brush marks left on the surface after the coat has dried.
- The dried surface of the wall should not appear should it easily stain the
- powdery nor hand when rubbed.
- Clean the floor immediately.
- Allow the first coat to dry for at least 24 hours and then start the second coat.
- Use 0.5kg of dry distemper to cover 10 sq.m. (108s.ft.) area.
- Add adhesíve/glue, 25gm for 1kg of paint.
- Stir this mixture constantly with a bamboo stick.
- Apply dry distemper in the same manner as the first coat.
- Apply successive coats of paint only after the prior coat has dried completely and never before 12 hours.
(B) FOR DRY DISTEMPER WITHOUT PRIMER AND PUTTY
- Prepare the surface as explained earlier.
- Apply the first coat of dry distemper directly on the prepared surface as per the procedure given earlier.
- Do not use the primer and putty before the first coat.
- After the first coat, fill all undulations, dents, cracks, etc. properly by applying putty, so that the surface is completely smooth.
- For deeper dents, the filling must be done with a filler paste of a thicker consistency and plaster of Paris.
- After drying (for 24 hours), the putty surface should be rubbed with fine polish paper for a smooth finish.
- Apply the second coat as explained above.
- After the second coat, check for any cracks or dents. If observed, they should be filled and proper rubbing should be done with fine polish paper.
- Apply the third coat as the final coat of paint.
- After drying, ensure that there are no brush marks or color variations.
- Clean the floor area.
- Ensure that the junction of the ceiling whitewash and wall distemper are painted in a proper line and level. cost
PRECAUTIONS IN DRY DISTEMPER
- Prepare the distemper paste after the surface is ready for distemper application.
- Do not use distemper which is prepared 24 hours earlier.
- Sieve the distemper slurry through fine cotton cloth, particles.
- Ensure that the shade/brand of the distemper is similar for all coats.
- Use brushes of the correct size/quality for different shades.
- Do not apply the distemper on wet walls.
- Check the quality of ingredients for the putty to remove any coarse
- preparation.
- Do not allow the painter to use a lesser quantity of distemper on the surface area than specified.
- Keep a minimum 8-hour gap between two coats in summer and an 18-hour gap in the monsoons.
- Do not forget to add adhesive/glue to the distemper.
FOR M.S. DOORS, GATES, WINDOWS
PREPARATION OF SURFACE
- Remove all cement mortar with a scraping Patti.
- Use sandpaper and emery black stone to remove any unwanted welding burr.
- The inner sides of the steel sections of the windows should be scraped properly. (Painters usually neglect this).
- Check for the free movement of hinges, and working systems. If required, get them repaired before the primer/first coat.
- Apply zinc chromite metal primer to the total surface of M.S. doors, windows, gates, etc. for the first coat of oil paint.
- After checking the required preparations, apply the first coat of oil paint with a good-quality brush.
- After 24 hours of drying, apply the second coat of oil paint.
- Ensure that all the inner sides of the steel sections of the windows are painted.
- Ensure that the painter uses 0.5 liters of oil paint per coat to cover 10 sq.m. (108s.ft.) of the plain surface.
- For quick drying of the paint, add a drier like Litharge or Massicot.
- Check the door shutters for free movements/bend/termite attack etc.
- Check the door frames for line/level/ plumb/quality etc.
- Do not fix the door fittings unless the first coat of oil paint is applied to the door shutters.
- Apply a wood primer to door frames and shutters.
- The top of the door shutters should also be painted with every coat of oil paint.
- After primer application, fill up any holes/depressions with primer putty. as mentioned earlier.
- Apply this putty on the total surface of the door shutter evenly with a metal sheet, to fill up all the dents, depressions, etc.
- The site engineer should approve the preparations before starting the first coat of oil paint.
- Mix the stainer in oil paint and prepare a sample of the approved color. sample of shade from the C.E.
- Check the approved quality/brand of oil paint and ensure that the sealed tins of the paint are opened in the presence of the engineer.
- Apply the first coat of oil paint with a varnish brush.
- Allow drying for a minimum of 24 hours.
- Check the quantity of stainer added in the first coat. The same quantity should be continued in the second coat.
- Use a small brush, in case of any narrow or underside of the door shutter/frame.
- Ensure that the sides of the cover moulding are painted with a small brush. (Painters usually neglect this).
- After completing the first coat, apply putty again on the portion where cracks/dents/depressions are observed.
- After rubbing off the putty patches, apply the second coat of oil paint as the final coat.
- Check the mixing for the perfect shade of both coats, to avoid any variations in shade.
- Do not disturb the shutter until it has dried completely.
- After drying, clean the door fittings with a paint remover solution or turpentine.
- Use the paint remover carefully. Do not allow it to come in contact with the shutter paint.
- Do not forget to paint the top of the shutter and the sides of the cover moulding.
- Paints used for all the coats should be of the same make and quality.
(a) CEMENT PAINT
Normally cement paint is used for the external walls of the building. Plastering of these walls is done with a sand-faced finish. Textured paints can be used for elevational features. For external painting, follow the procedure mentioned below.
- For better work quality, all exterior painting work procedure should be carried out on scaffolding.
- Try to avoid using Zula.
- Clean the external wall surface by removing dust, mortar droppings, etc. with a scraper and sandpaper 80 No.
- Finish all the internal as well as external works including all finishing. plumbing lines, electrical works, etc.
- Water the surface for at least 12 hours, before applying the first coat of cement paint.
- Fill all the cracks with white cement or crack filler chemicals.
- Prepare the cement paint by adding water to the ready-made cement paint which is available in powder form.
- Add 1 liter of water to 1kg of cement paint. Mix thoroughly to get a creamy consistency. 3kg of cement paint should cover two coats of 10sq.m. (108s.ft.) wall surface.
- Apply the first coat with a good-quality brush. Brushstrokes should be first horizontal and then vertical, to avoid brush marks on the surface.
- Cure the first coat 6 times a day for 7 days, by using spray pumps.
- Fill up the hairline cracks with filler material.
- Ensure that the first coat is a bit thicker.
- Do not allow the painter to do the second coat until the curing period of the first coat is over.
- Apply the second coat by using 1.25kg cement paint to cover 10. m. (108s.ft.) of the wall surface.
- Allow the second coat to dry for a minimum of 24 hours.
- Cure the second coat for 7 days with a spray pump or water pipe.
- Clean the surfaces like windows, glass, terrace floor, pipes, doors, fixtures, electrical switches, etc. thoroughly.
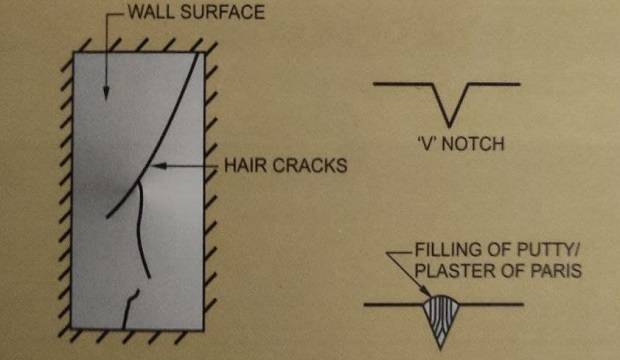
- Ensure that cement paint powder is added to the water and not vice versa.
- Only the required quantity of paint, for one hour’s work, should be mixed at a time.
(b) TEXTURED PAINT
- Normally, textured paint is applied in three coats, including the base coat.
- Basecoat should match the color of the cement paint.
- Apply two coats of textured paint.
- Sometimes one coat of cement paint as a base coat and one coat of textured paint suffices for the required finish.
- 1.7 liters of textured paint should cover 2 coats of 10sq.m. (108s.ft.) wall surface.
- Follow the same procedures as cement paint, for textured painting work procedure.
- Textured paint is available in liquid form.
- Ready-made textured paint is also available in the required consistency. It can be directly applied with a brush.
(c) FRENCH POLISH TO WOODEN SURFACE
The following work sequence should be adopted for polishing works
- Clean the wooden surface of all dirt/dust, by rubbing it with a fine cloth.
- Rub the surface with polished paper 80 No. to clear up the veins of a single door from both sides.
- Apply a coat of polish powder 1.25kg to cover 10s.qm. (108s.ft.)
- Rub the surface with a polished paper.
Knotting or Stopping
All the visible and minor holes, and indentations in the wood’s surface are filled either by mixing whiting (ground chalk) in methylated spirit with 1.25kg of whiting to 1 liter of spirit or mixing beeswax linseed oil and turpentine.
- Rub the surface with polished paper and wipe clean.
Preparation for French Polish
Mix 0.15kg of pure Shellac in 1 liter of methylated spirit and sieve the solution through a cotton cloth. Add pigment to get the required shade. In the case of ready-made polish, use 0.4 liters of polish to cover 10s.qm. (108s.ft.)
Application of French Polish
Apply polish with a pad of woolen cloth covered by a fine cloth. Wet the pad with the polish and rub gently on the surface in a universal direction (either horizontal or vertical) to cover the entire area.
Application of second third coat of polish
- After the first coat has dried, apply the second third coat or more coats, in the same way as described above, to get the desired finish as per the requirements.
- Take precaution to place papers on the floor before starting polishing work, to prevent staining of the tiles. It is very difficult to remove polish stains from the floor tiles.
- Ensure that the shade of polish is by the Chief Engineer.
- Check the complete work for the correct shade, polish quality, and shining of polish. entire area covered, cleaning of door fittings, floor, etc., and giving the final N.O.C. to the contractor for the clearance of his bill.
GUIDELINE FOR PREPARING ESTIMATION PAINTING WORK MIX FOR 10sq.m. (108S.FT.) OF SURFACE AREA
| SR NO | ITEM | MATERIAL | QUANTITY |
| 1 | DONGA | LIME WATER POLISH PAPER (120 NO) |
0.50KG 1.25LITRE 1 NO |
| 2 | WHITEWASH (FOR EACH COAT) |
LIME WATER DDL/GLUE BLUE |
0.75KG 2.50LITTER 25GM AS PER REQUIREMENT |
| 3 | DRY DISTEMPER PRIMER APPLICATION (1 COAT) |
CEMENT PRIMER TURPENTINE |
0.80 LITTER 0.40 LITER |
| PUTTY APPLICATION (5 KG) (1 COAT + TOUCH UP) |
WHITING POWDER CEMENT PRIMER SYNTHETIC ENAME LINSEED OIL WATER POLISH PAPER (120 NO) |
3 KG 0.25 LITTER 0.25 LITTER 0.15 LITTER 1 LITTER 1 NO |
|
| DISTEMPER APPLICATION FOR 2ND COATS |
DISTEMPER WATER DDL/GLUE POLISH PAPER (120 NO) |
2 KG 1.50 LITTER 50GM 1 NO |
|
| 4 | OIL PAINT (1 COAT PRIMER AND 2nd COAT OIL PAINT) PRIMER APPLICATION A) FOR WALL |
CEMENT PRIMER TURPENTINE PUTTY |
0.80 LITTER 0.40 LITTER 5 KG |
| OIL PAINT (2nd COAT) A) FOR WALL |
OIL PAINT TURPENTINE POLISH PAPER (300 N) |
1.25 LITTER 0.25 LITTER 2 NO |
|
| B) FOR M.S WINDOWS | ZINC CHROMITE PRIMER EMERY BLACK POLISH PAPER (150 NO) OIL PAINT TURPENTINE |
1 LITTER 3 NO 1 LITTER 0.25 LITTER |
|
| 5 | FRENCH POLISH | READY FRENCH POLISH | 0.5 LITTER |
| PUTTY PREPARATION | WHITTING METHYLATED SPIRIT |
1.25 KG 1.0 LITTER |
|
| POLISH PREPARATION | SHELLAC METHYLATED SPIRITE (PIGMENTS FOR SHADE) |
60 GM 0.40 LITTER AS REQUIRED |
|
| 6 | CEMENT PAINT (2nd COATS) |
CEMENT PAINT WATER |
3 KG 3.0 LITTER |
PAINTING WORK MODE OF MEASUREMENT
| OPENING | DEDUCTION | JAMS / SOFFITS |
| GREATER THAN 0.5 SQ.M | FULL DEDUCTION | TO BE GIVEN |
| LESS THAN 0.5 SQ.M | NO DEDUCTION | NOT TO BE GIVEN |
(b) Distemper whitewashes oil bond/cement paint etc. as per the measurements of plaster. Jams and soffits to be included in the measurements. Door and window openings to be deducted fully.
(c) All pipes and steel poles to be measured in a running meters, inclusive of fittings.
(d) Oil paint to wooden or M.S. surface to be measured from one face and apply a multiplying factor to get the painting area for billing purposes.
We Use 4 Strategies To Manage Our Constructions Supplies

Proline Construction Materials by Real Estate1 Agency Corporation, Photo1
Construction projects can be a nightmare if they are not meticulously planned. In addition to managing your workers, you need to stay on top of inventory to make sure the entire process runs smoothly. After all, the last thing any construction contractor wants to be known for is overrunning on time and budget. If you are looking to boost your material management strategy, here are some handy tips to organize your construction supplies.
#1. Ensure timely material delivery
In a perfect world, your construction supplies would be at your fingertips when you need them. But in reality, late supplies can cause delays and downtime, affecting your entire schedule. To prevent supply setbacks, work with a construction material supplier you can count on.
Teaming up with the right supplier means never having to worry about late shipments. They will not only ship out all the quality products you need to get the job done right but also ensure your materials are delivered on time.
#2. Optimize inventory
Over or underestimating your inventory can create problems with your supply chain. Not having the right amount of stock can eat into profits and waste valuable company time.
Solution? Partner with a construction material supplier who has the experience and know-how to help you make the most of inventory optimization. They will stay on top of what you ordered, when you ordered, and where you can order more construction supplies for your project.
#3. Deliver to the proper locations
It sounds obvious, but it happens more often than you might think. Construction supplies that are sent to the wrong job site are going to lead to labor stoppages and costly wait times.
Don’t let something as important as on-time delivery ruin your schedule. With a professional supplier on your side, say goodbye to confusing delays in distribution.
#4. Ask the experts
There are a lot of products that go into a successful construction project. Whether it is for a roofing, insulation, or waterproofing job, you will need to have the top construction supplies available and know how to properly utilize them.
If you need help wrapping your brain around the intricacies of construction supplies, a professional supplier is there to help. They have a full range of all the leading products, backed up with industry-specific knowledge to clear up any confusion.
Whether you are insulating a home or applying siding materials to a warehouse, things can go wrong. However, applying a solid construction supply strategy and working with a reliable supplier will help streamline the process and improve productivity.
Do you have a construction project underway? For quality products and great service, Contact Us at “Real Estate1 Agency Corporation’s Constructions Department”.
FAQ
Here, you will find the “Frequented Asked Questions”, Main Crucial Questions and Answers, you should asked your self about it?

WHAT IS THE BUILDING CONSTRUCTION PROCESS FROM START TO FINISH?
The building construction process starts from pre-construction, construction, and finally, post-construction. Each of these phases involves different activities.
WHAT IS THE CONSTRUCTION PROJECT CYCLE?
The construction project cycle begins from strategic definition and design to construction and then handover.
WHAT IS THE ORDER OF CONSTRUCTION?
Construction order refers to the major sequence of work followed while constructing a building. Construction order typically starts with marking, excavation, foundation, framing, brick masonry, roofing, flooring, and finishing. All these steps include several activities.
WHAT IS THE FIRST STEP OF BUILDING CONSTRUCTION?
The first step of building construction is ensuring the ground is cleared and graded properly. The next step after preparing the land is pouring the foundation. The type of foundation is determined by the type and size of the building.
The skeleton is then created through framing. The walls and windows, doors, and fittings are installed. The electrical and plumbing are done Next. The roof is put up, and the finishing is done.
About Us

Engineer Khattab Omar Abuisbae “Istanbul”, Turkey, Year1978, Photo.
The way we deal with you, when hiring us, to build your property constructions, whatever it’s, we save you, headaches, time, and Money; “From Breaking Ground To Handing Over The Keys”.

No Project Too Big Or Too Small

Scroll Down
Years Established
Completed Projects
Happy Clients
How We Work
Real Estate1 Agency Corporation support our urban landscapes’ sprawling growth in the modern world. They orchestrate the complex symphony of turning architectural dreams into concrete reality. But have you ever paused to wonder about the machinery that operates behind the scenes?However unveils the multifaceted realm of “how our construction Department of our company works,” shedding light on the diverse operations that ensure the seamless transition from blueprints to built structures.


We’ve Been Building For Over 10 Years

Call for A Quote
+(424) 777-2201
+(962) 79-681-9201
+(962) 77-830-3512 & WhatsApp

Building Construction
We Do it from Scratch Like “Pizza People Do”, We’re using our experienced team of “Architecture & Civil Engineers”; Which completing each others work!

Building Construction
We Do it from Scratch Like “Pizza People Do”, We’re using our experienced team of “Architecture & Civil Engineers”; Which completing each others work!
I have been dreaming about the house, I wanted to own and build, since I was 16 years old, Right now I have taken the hardest and most crucial decision myself, eventually and finally after I did spent alot of time searching for the right, a construction company to do this kind of work for me, I chose with full confidence, comfortable and trust; “Real Estate1 Agency Corporation’s Constructions Department”!

Juanita Moran
Booking Tunes
I have been in business for the last 17 years, One day I decided, I wanted to build a prestige restaurant for my “Hollywood Movie Stars Celebrities”, Looking around and looking around so many times, one day I met another businessman, who owned a restaurant in “Beverly Hills City, California”‘; As his previous experience with his own restaurant Building Constructions for the first time; to reach and contact, “Real Estate1 Agency Corporation’s Constructions Department? They did to me a “Piece-of-art” resurant of my own!

Saif Guerra
As my profession and my career; I need to be the owner of a “Cinema Theater Building”; As the huge, big and widest proceeding reputation ahead, after thoughtful thinking, and too many hours and money of searching, my coworkers and colleagues, advised me to connect with “Real Estate1 Agency Corporation’s Constructions Department”; I contacted them; We fixed a meeting in person for the 1-hour meeting; I condensed 100%; They the right “Architecture & Civil Engineers”; Who are capable and eligible with full capacity and manpower to execute my “Cinema Theater Building Constructions”; to be real as existance and live!

Kason Espinosa
Let’s Build Something Together
Who We Are?
We’re “Real Estate1 Agency Corporation” ” founded and only owned by, Engineer “Khattab Omar Abuisbae”; He designed structured, planned, and organized his corporation and organization; to deal with his clients; In a family-friendly; With friends to friends atmosphere environment of business full of trust, comfort, worth trusty, Our main target fair dealing for both parties!
Don't Hesitate To Call?
We’re here to help to find what you’re looking for as “Real Estates Services & Products”?
We're Available During all our Office's Hours?
You, welcome to call and contact us, during hour regular Office’s Hours, at any time we’re avaliable here to help and answers all your questions and concernces?
Get Your Free Quote
Contact Us
President& CEO Office
Phones:
+(424) 777-22016258
+(962) 79-681-9201
+(962) 77-830-3512 & WhatsApp
Follow Us
Real Estate1 Agency Corporation
“We Sell It Faster For More Money”!
Office
421 North Rodeo Drive, Beverly Hills, CA 90210
Phone Number
(424) 777-2201
+(962) 79-681-9201
+(962) 77-830-3512
Social Media
+(962) 77-830-3512
Skype: Khattab O Abuisbae
Business Hours
Monday to Sunday 8:00 A. M to 4:00 P. M
This is the place you will feel comfortable to deal with.!

Real Estate1 Agency’s Logo1.
"We Sell It Faster For More Money"!

Engineer Khattab Omar-Abuisbae, “Istanbul”, “Turkey”, Year 1978 Photo.
Do you need some help?
Don’t hesitate to call us at our office Hours.

